


10 Questions You Should Ask Before Hiring A Contractor
Before you hire a landscape contractor, it’s important to ask the right questions. For high-end homeowners, your outdoor space is more than a yard — it’s an investment in your home, lifestyle, and long-term property value. From insurance and installation standards to drainage, materials, warranties, and communication, the contractor you choose will determine not only how your landscape looks, but how well it performs for years to come.
Hiring a landscape contractor is about more than choosing someone who can install plants, pavers, or outdoor lighting. For high-end homeowners, your landscape is an extension of your home, your lifestyle, and your investment. The right contractor should bring craftsmanship, communication, technical knowledge, and long-term vision to the project.
Before you commit to a landscape design or installation company, here are ten important questions to ask.
1. Are you insured and properly qualified for the work being performed?
While Michigan does not require a general landscape contractor license for most standard landscape or hardscape installation work, homeowners should still verify that the company is properly insured and experienced for the project's scope.
A reputable contractor should be transparent about their insurance, qualifications, and whether any permits or outside professionals are needed for your project.
2. Do you specialize in the type of project I’m planning?
Not all landscape companies are the same. Some focus mainly on maintenance, while others specialize in design-build projects, hardscapes, outdoor living spaces, drainage, planting design, lighting, or full-property transformations.
If you are investing in a patio, retaining wall, raised paver patio, outdoor kitchen, or luxury landscape installation, you want a contractor with proven experience in that specific type of work.
3. Can you explain your installation process?
A high-quality landscape is built from the ground up. The beauty you see on the surface depends heavily on what happens beneath the surface.
Ask your contractor how they handle excavation, base preparation, drainage, compaction, edge restraints, soil preparation, and material installation. A true professional should be able to explain their process in a way that gives you confidence.
For hardscape projects, details like proper base depth, compacted lifts, drainage stone, geogrid when needed, and edge restraint systems all affect long-term performance.
4. What materials do you recommend, and why?
High-end landscapes require materials that are both beautiful and durable. Ask your contractor why they recommend certain pavers, wall block, natural stone, lighting fixtures, plants, mulch, or soil amendments.
The cheapest material is rarely the best long-term investment. A quality contractor should be able to explain the difference between budget products and premium materials, including appearance, durability, warranty, availability, and maintenance needs.
5. How do you handle drainage?
Drainage is one of the most overlooked parts of landscape installation, but it is also one of the most important.
Poor drainage can cause settling, erosion, plant failure, standing water, foundation concerns, and premature hardscape issues. Before hiring a contractor, ask how they evaluate water movement on the property and how they plan to direct water away from structures, patios, walls, and planting beds.
A beautiful landscape should not only look good — it should function properly.
6. What is included in the estimate?
A detailed estimate protects both the homeowner and the contractor. Before moving forward, make sure you understand what is included and what is not.
Ask whether the estimate includes demolition, excavation, disposal, materials, delivery fees, equipment, labor, cleanup, grading, soil restoration, warranties, and finishing touches.
High-end homeowners should be cautious of vague estimates. If one proposal is significantly cheaper than another, it may be because important items were left out.
7. Who will be managing the project?
Strong project management is essential for a smooth experience. Ask who your main point of contact will be, who will be on-site, and how communication will be handled throughout the project.
You should know how updates will be shared, how changes will be approved, and what to expect during each phase of the installation.
A professional company should make the process feel organized, transparent, and respectful of your time and property.
8. What kind of warranty do you offer?
A contractor who stands behind their work should be willing to clearly discuss warranty terms.
Ask what is covered, how long the warranty lasts, and what is considered normal wear, maintenance-related, or outside the contractor’s control. For example, warranties may differ for pavers, walls, lighting, plants, polymeric sand, or customer-supplied materials.
Clear warranty language helps avoid confusion and shows that the contractor values long-term client satisfaction.
9. How do you protect my property during construction?
Landscape construction can involve equipment, excavation, material deliveries, soil removal, and heavy foot traffic. A professional contractor should have a plan for protecting your lawn, driveway, existing plants, irrigation, utilities, and surrounding landscape features.
Ask how they handle access, staging materials, daily cleanup, and restoration of disturbed areas.
A high-end installation should not leave the rest of your property damaged or neglected.
10. What makes your company different?
This question helps you understand the contractor’s values, standards, and approach.
Do they prioritize craftsmanship? Sustainability? Communication? Premium materials? Technical installation standards? Long-term relationships? Design creativity?
The right contractor should be able to clearly communicate what sets them apart — not just in words, but through their process, portfolio, professionalism, and finished work.
Final Thoughts
Your landscape is a long-term investment in your home, your lifestyle, and the way you experience your outdoor space. Whether you are planning a luxury patio, a complete front yard transformation, a retaining wall, outdoor lighting, or a full landscape installation, choosing the right contractor matters.
A quality landscape contractor should bring more than labor to the project. They should bring knowledge, craftsmanship, communication, integrity, and a commitment to doing the job right.
Before hiring, take the time to ask thoughtful questions. The answers will tell you a lot about the experience you can expect — and the quality of the finished landscape you will enjoy for years to come.
Looking for a Landscape Contractor You Can Trust?
At VisionScapes, we specialize in thoughtful landscape design, premium hardscape installation, outdoor living spaces, and sustainable landscape solutions. Our team is committed to craftsmanship, clear communication, and creating outdoor spaces that are built to last.
Contact VisionScapes today to start planning your next landscape transformation.

Why Curvilinear?
Curvilinear landscape design brings movement, softness, and natural beauty to an outdoor space. Instead of relying on rigid squares and rectangles, flowing bedlines create a more custom, inviting landscape that feels connected to the home, the land, and the way people actually live outdoors.
In landscape design, straight lines have their place. A clean walkway, a structured patio, or a modern retaining wall can bring order and definition to an outdoor space. But when every landscape becomes a series of squares, rectangles, and hard corners, something starts to feel missing.
At VisionScapes, we believe outdoor spaces should feel alive. They should move with the land, soften the architecture, and invite people into the landscape — not just place them on top of it.
That is why we are drawn to curvilinear design.
What Is a Curvilinear Landscape?
A curvilinear landscape uses flowing lines, sweeping bed edges, rounded patios, soft pathways, and organic transitions instead of relying only on rigid square or rectangular layouts.
Rather than forcing the outdoor space into a box, curvilinear design allows the landscape to feel more connected to nature. It creates movement. It guides the eye. It softens the edges of the home and makes the entire property feel more intentional.
A curved planting bed, a gently arcing walkway, or a patio with rounded borders can completely change the way a space feels.
Why Rectangles Are Overused in Landscape Design
Many landscapes today are built around convenience instead of creativity. Squares and rectangles are easy to measure, easy to estimate, and often easier to install. As a result, they have become overused.
As a result, many outdoor spaces start to look the same.
A rectangular patio. A straight walkway. Boxed-in beds. Hard edges everywhere.
While that style can work for certain homes, especially very modern architecture, it can also feel flat, predictable, and disconnected from the natural environment.
Nature rarely grows in perfect rectangles. Trees don’t form square canopies. Rivers don’t move in straight lines. Garden beds, stone edges, and plantings often feel more natural when they have softness and movement.
Curves Create Flow
One of the biggest advantages of curvilinear design is flow.
A curved walkway naturally invites you forward. A rounded patio edge makes the space feel more relaxed. A sweeping bed line pulls your eye across the landscape and helps connect one area to another.
Instead of the landscape feeling like separate pieces, curves help everything work together.
The front entrance can flow into the foundation plantings. The patio can transition into the lawn. The garden beds can wrap around trees, boulders, lighting, and natural features in a way that feels intentional rather than forced.
Good design should guide people through a space without them even realizing it.
Curvilinear Design Feels More Custom
A square patio can feel like it was dropped onto a property. A curvilinear design feels as if it were created specifically for that property.
That is the difference between standard installation and true design.
Curves require thought. They require layout, proportion, craftsmanship, and an understanding of how people will actually use the space. They also allow the designer to respond to the home's architecture, the yard's slope, existing trees, views, drainage patterns, and the client’s lifestyle.
For high-end homeowners, that custom feel matters.
A luxury landscape should not feel like a template. It should feel like it belongs.
Curves Soften the Home
Homes are already full of straight lines. Walls, windows, rooflines, driveways, sidewalks, and foundations are usually built with strong geometry.
Landscape design gives us an opportunity to soften that structure.
Curved beds around the foundation can make a home feel more welcoming. A rounded walkway can make the entrance feel less harsh. A patio with a graceful border can create a more comfortable outdoor living space.
The right curves can balance the architecture rather than compete with it.
Organic Shapes Create Emotional Impact
A well-designed outdoor space should do more than look good. It should make people feel something.
Curvilinear landscapes often feel more peaceful, natural, and inviting because they mirror the forms we see in nature. They create a sense of movement and calm. They encourage people to slow down, walk through the space, and experience the landscape rather than just look at it.
That emotional connection is what makes a landscape memorable.
It is the difference between a backyard with a patio and one that feels like a retreat.
Curves Can Still Be Clean and High-End
A common misconception is that curved landscapes are only for informal or cottage-style gardens. That is not true.
Curvilinear design can be incredibly refined when it is done with intention.
A curved paver patio with a clean soldier course border can feel elegant and timeless. A sweeping bed edge with structured plant masses can feel polished and upscale. A curved retaining wall or sitting wall can create a strong architectural statement while still feeling more natural than a rigid box.
The key is balance.
Curves should not be random. They should have purpose, proportion, and rhythm.
The Craftsmanship Behind Curves
Curves are not always easier to build. In many cases, they require more skill.
Paver cuts need to be precise. Borders need to flow correctly. Bed edges need to be shaped with intention. Walls and steps need to feel natural while still being structurally sound.
That is part of what makes curvilinear landscapes special.
They show craftsmanship.
When done well, the finished space feels effortless — but behind that effortless look is careful planning, layout, and execution.
When Straight Lines Still Make Sense
Curvilinear design does not mean every landscape should avoid straight lines. Some properties call for a more formal or modern design. Straight lines can create structure, symmetry, and clean visual order.
The best landscapes often use a combination of both.
Straight lines can anchor a space, while curves bring softness and movement. A rectangular patio may be softened with curved planting beds. A straight walkway may be paired with sweeping borders. A modern home may benefit from structured geometry with subtle organic transitions.
Good design is not about choosing curves or straight lines. It is about knowing when and how to use each.
Our Design Philosophy
At VisionScapes, we do not believe every landscape should look the same. We believe outdoor spaces should reflect the home, the land, and the people who live there.
For us, curvilinear design is about more than aesthetics. It is about connection.
Connection to nature.
Connection to the architecture.
Connection to how people move, gather, rest, and live outdoors.
Squares and rectangles may be efficient, but they are not always inspiring. A thoughtfully designed curve can transform a landscape from basic to beautiful, from predictable to personal, and from installed to truly crafted.
Final Thoughts
If your landscape feels rigid, flat, or uninspired, it may not need more square footage. It may need better flow.
Curvilinear landscapes bring movement, softness, and a sense of natural beauty to outdoor spaces. They help a property feel more custom, more inviting, and more connected to the world around it.
At VisionScapes, we design and build landscapes that go beyond the ordinary — spaces that feel intentional, natural, and deeply connected to the way our clients want to live.
Ready to create an outdoor space with more movement, beauty, and purpose? Contact VisionScapes to begin your landscape transformation.

Why Wait for Spring Cleanup?
At VisionScapes, we approach spring cleanup with intention. By waiting for the landscape and its pollinators to fully awaken, we help preserve the natural systems that support a healthy, thriving outdoor environment—because true beauty and stewardship should go hand in hand.
At VisionScapes, we believe a truly exceptional landscape should do more than look beautiful. It should function in harmony with the natural world, support the health of the property, and reflect a thoughtful standard of care. That is why we do not rush spring cleanup at the first sign of warmer weather.
Throughout the winter months, many pollinators and beneficial insects rely on hollow stems, dried grasses, fallen leaves, and other plant debris for shelter. What may appear dormant or unrefined at the end of winter often provides essential habitat for native bees, butterflies, ladybugs, and other beneficial species. Removing this material too early can disrupt that life cycle before these important pollinators have had the opportunity to emerge safely.
In Mid-Michigan, one of the clearest signs that spring cleanup can begin more safely is when nighttime temperatures become more consistent and no longer regularly dip into the 40s. Nature often offers its own cues as well. The blooming of apple blossoms and the appearance of wild violets can be helpful indicators that spring is progressing and many overwintering insects are becoming active again.
Another simple but meaningful way to support pollinators is to allow dandelions to bloom in early spring. At a time when few other food sources are available, dandelions can provide valuable nectar for bees and other pollinators emerging from winter dormancy. While they are often viewed as a weed, they can play an important role in supporting early-season insect activity.
Waiting to begin spring cleanup is a small but intentional choice that can have a lasting ecological impact. It allows the landscape to transition more naturally into the growing season while preserving habitat that supports the balance and health of the broader environment.
This philosophy reflects the way we approach our work as a whole. At VisionScapes, we are not simply maintaining outdoor spaces for appearance alone. We are creating landscapes that are refined, functional, and environmentally conscious—spaces that elevate the property while respecting the natural systems that sustain it.
Sustainability is not an afterthought. It is part of the standard we build by.

The Anatomy of a High-End Paver Patio
At VisionScapes, we believe luxury begins with a solid foundation of craftsmanship. A premium patio should not only look exceptional on day one, but also perform beautifully for years to come. That level of quality comes from thoughtful design, proper site preparation, superior materials, and installation methods that go beyond minimum standards.
A beautiful patio is easy to admire. Clean lines, rich textures, elegant materials, and a finished outdoor space that feels like an extension of the home. But what truly separates a high-end paver patio from an average one is not just what you see on the surface — it is everything beneath it.
At VisionScapes, we believe luxury begins with a solid foundation of craftsmanship. A premium patio should not only look exceptional on day one, but also perform beautifully for years to come. That level of quality comes from thoughtful design, proper site preparation, superior materials, and installation methods that go beyond minimum standards.
Here is a closer look at the anatomy of a high-end paver patio.
1. Intentional Design
Every exceptional patio starts with a strong design. A high-end patio is never just a flat area filled with pavers. It is carefully planned to complement the architecture of the home, support the way the homeowner wants to live, and create a sense of flow throughout the landscape.
Good design considers:
Scale and proportion
Traffic patterns
Outdoor furniture layouts
Views to and from the home
Drainage and grading
Material and color harmony
The result is a space that feels natural, functional, and elevated.
2. Proper Excavation
The beauty of a patio means very little without a proper foundation. One of the most important steps in the process is excavation. A high-end patio requires enough soil to be removed so the base system can be installed correctly at the proper depth.
Shortcuts here often lead to settling, shifting, poor drainage, and premature failure. Proper excavation creates room for a patio structure that is built to last.
3. A Strong, Compacted Base
This is where true quality begins. The base is the structural backbone of a paver patio. Without it, even the most expensive pavers will eventually move, sink, or separate.
A high-end installation includes:
The proper depth of compacted aggregate base. 7” in Michigan.
High-quality base material. Crushed Limestone (23AA)
Installation in 3” compacted lifts
Careful grading for water movement
At VisionScapes, we believe a patio should feel solid underfoot because it is solid from the ground up.
4. Precision Bedding Layer
Above the compacted base sits a bedding layer that helps create a smooth, accurate setting surface for the pavers. This layer must be consistent, properly leveled, and installed with care. We use limestone fines as an alternative to a traditional sand bedding layer, helping reduce the risk of weed growth and paver shifting when installed properly.
Too much variation in this layer can affect the final patio surface. Precision here helps achieve the clean lines and refined finish that luxury hardscaping demands.
5. Premium Paver Selection
Not all pavers are created equal. A high-end patio typically uses premium materials with richer textures, more refined color blends, stronger manufacturing standards, and a more timeless appearance.
The right paver selection should reflect:
The style of the home
The character of the landscape
The desired atmosphere of the space
Long-term durability
This is where aesthetics and performance meet. Premium pavers help create a patio that feels custom rather than commonplace.
6. Clean Edge Restraint
One of the most overlooked details in a patio installation is the edge restraint. Yet it plays a major role in the longevity of the project. Proper edge restraint helps lock the system in place and prevents the patio from spreading or shifting over time. We use a concrete edge restraint system that provides superior strength and longevity compared to traditional plastic edging options.
A high-end patio is defined by strong, clean edges that hold their integrity year after year.
7. Polymeric Sand in the Joints
The joints between pavers matter more than many homeowners realize. Polymeric sand helps stabilize the paver system, reduce weed intrusion, and discourage insect activity between joints.
When installed properly, it helps maintain a tighter, cleaner finished surface while supporting the overall durability of the patio. A patio overrun with weeds is often the result of missing polymeric sand or improper joint sand installation. At VisionScapes, we go a step further by using advanced compaction equipment to properly settle and activate polymeric sand for a cleaner, longer-lasting finish.
8. Drainage Built Into the Plan
Luxury is not just about appearance. It is also about performance. A high-end patio must be built with drainage in mind from the beginning. Water should move away from the home and off the patio surface in a controlled way.
Without proper drainage, even a beautiful patio can become problematic. Standing water, erosion, and shifting are all signs of a system that was not designed correctly.
9. Finishing Details That Elevate the Space
The difference between standard and exceptional often comes down to detail. In a high-end patio, every element should feel intentional.
This can include:
Thoughtful border accents
Coordinated steps and landings
Seating walls
Integrated lighting
Fire features
Plantings that soften and frame the hardscape
These details transform a patio from a simple surface into a complete outdoor living experience.
10. Craftsmanship Above All
Ultimately, the anatomy of a high-end paver patio is about more than materials alone. It is about installation quality, design intelligence, and a commitment to doing things the right way.
A luxury patio should feel substantial. It should function beautifully. It should enhance the home and create a lasting place for gathering, relaxing, and enjoying life outdoors.
That kind of result does not happen by accident. It is built layer by layer, detail by detail, with a clear standard of excellence.
Invest Below the Surface
When homeowners compare patios, it is easy to focus on the visible finish. But the true value of a high-end paver patio lies beneath the surface. The excavation, base preparation, drainage planning, material quality, and craftsmanship all determine whether a patio remains beautiful and stable for years to come.
At VisionScapes, we believe outdoor spaces should be built with both beauty and integrity. Because a patio is not just another project — it is the foundation for moments, memories, and everyday living.
Plan Your Garden
As you daydream of warm, sunny days while looking out frosted windows, winter is the perfect time to start planning your summer garden.
Plan Your Summer Garden from the Comfort of Your Couch
As you daydream of warm, sunny days while looking out frosted windows, winter is the perfect time to start planning your summer garden. Best of all, there’s no need to hunch over a computer or brave the cold—this planning can be done comfortably from your cozy couch.
Taking time now to think ahead will set you up for a smoother, more successful growing season once spring arrives.
7 Key Considerations for Planning Your Summer Garden
1. Budget
Start with a realistic budget to determine what’s achievable. It’s easy to get carried away with ambitious ideas, so pricing out your essentials in advance can help keep expectations in check. Be sure to account for seeds, plants, soil amendments, tools, irrigation, and any new materials you may need.
2. Garden Design
Designing your garden layout is an enjoyable winter activity that allows you to visualize the finished space. A simple hand-drawn planting plan can help ensure you have enough room for each plant and prevent overcrowding. This step also helps narrow down your wish list—you may discover you can’t grow everything, and that’s okay!
3. Location
Choosing the right location is especially important for first-time gardeners. Look for an area that receives 6–8 hours of sunlight per day, has good drainage, and is protected from strong winds.
4. Plant Selection
This is the fun part! Think about what you’d love to grow, but also select plants suited to your climate, soil type, and light conditions. Starting with easy-to-grow vegetables or flowers can build confidence and set you up for success.
5. Preparing a New Garden Space
Turning lawn into garden can be done in several ways. One budget-friendly option is using recycled cardboard to smother grass—simply layer it over the lawn and cover it with compost. Cardboard breaks down naturally and can remain in place.
Another method is solarization using a tarp, though the tarp must be removed before adding compost. With cardboard, you can plant directly into the compost placed on top.
6. Soil Quality
Healthy soil is the foundation of a thriving garden. Improve both new and existing beds by adding compost. If possible, test your soil for pH and nutrient levels to ensure optimal plant growth.
7. Watering Needs
Make sure you have a reliable water source nearby. Whether you choose a drip irrigation system or a consistent manual watering schedule, planning ahead will save time and stress during the busy summer months.
Taking time now to research and plan your garden will pay off with healthier plants, higher yields, and a more enjoyable growing season.
Easy-to-Grow Vegetables and Flowers
If you’re new to gardening, start with plants known for their resilience and low maintenance.
Vegetables
Radishes – Fast-growing and extremely easy to care for
Lettuce – Grows quickly and can be harvested multiple times
Green Beans – Thrive in a variety of conditions
Zucchini – Prolific producers; a few plants go a long way
Tomatoes – Versatile and rewarding; provide stakes or cages
Peas – Simple to grow and ready early in the season
Flowers
Marigolds – Hardy, colorful, and help deter pests
Sunflowers – Cheerful, tall blooms that are easy to grow
Zinnias – Low-maintenance, colorful, and pollinator-friendly
Pansies – Tolerate cool weather and add early-season color
Cosmos – Effortless to grow with delicate blooms
Nasturtiums – Easy-growing, edible flowers with vibrant color
These beginner-friendly plants are forgiving and rewarding, making them perfect choices for new gardeners.
Happy gardening—and enjoy the planning process! 🌱

Why We Wait to Trim Our Ornamental Grasses Until Spring
As landscapers, we often get asked why we don’t cut back ornamental grasses in the fall. While it may seem natural to tidy everything up before winter, leaving these plants standing through the colder months actually benefits your landscape—and the environment—in several important ways.
1. They Add Beautiful Winter Interest
Ornamental grasses bring structure, movement, and texture to the garden year-round. In winter, their golden seed heads catch the light, their upright forms rise above the snow, and even the slightest breeze brings them to life.
Instead of a flat, barren yard, you get a dynamic winter scene that feels intentional and visually rich. Many homeowners are surprised by how much they enjoy the look once they see it through a full season.
2. They Provide Valuable Wildlife Habitat
During winter, birds and small mammals rely on the landscape for protection from harsh weather. Ornamental grasses offer:
Natural shelter
Nesting materials
Safe spaces to huddle during storms
Cutting grasses too early removes an important refuge for wildlife when resources are at their lowest.
3. They Support Pollinators Through the Cold Months
A healthy garden supports more than just its plants—it supports an entire ecosystem. Many beneficial insects, including native bees and butterflies, overwinter in the hollow stems, foliage, or at the base of ornamental grasses.
By delaying trimming until spring, you help these pollinators survive the winter so they can emerge and continue supporting the health and productivity of your landscape.
The Bottom Line
Leaving ornamental grasses standing until spring isn’t neglect—it’s intentional, environmentally friendly, and beneficial for both aesthetics and ecology. When spring arrives and temperatures warm, a proper cutback encourages fresh growth, healthier plants, and a thriving habitat all year long.
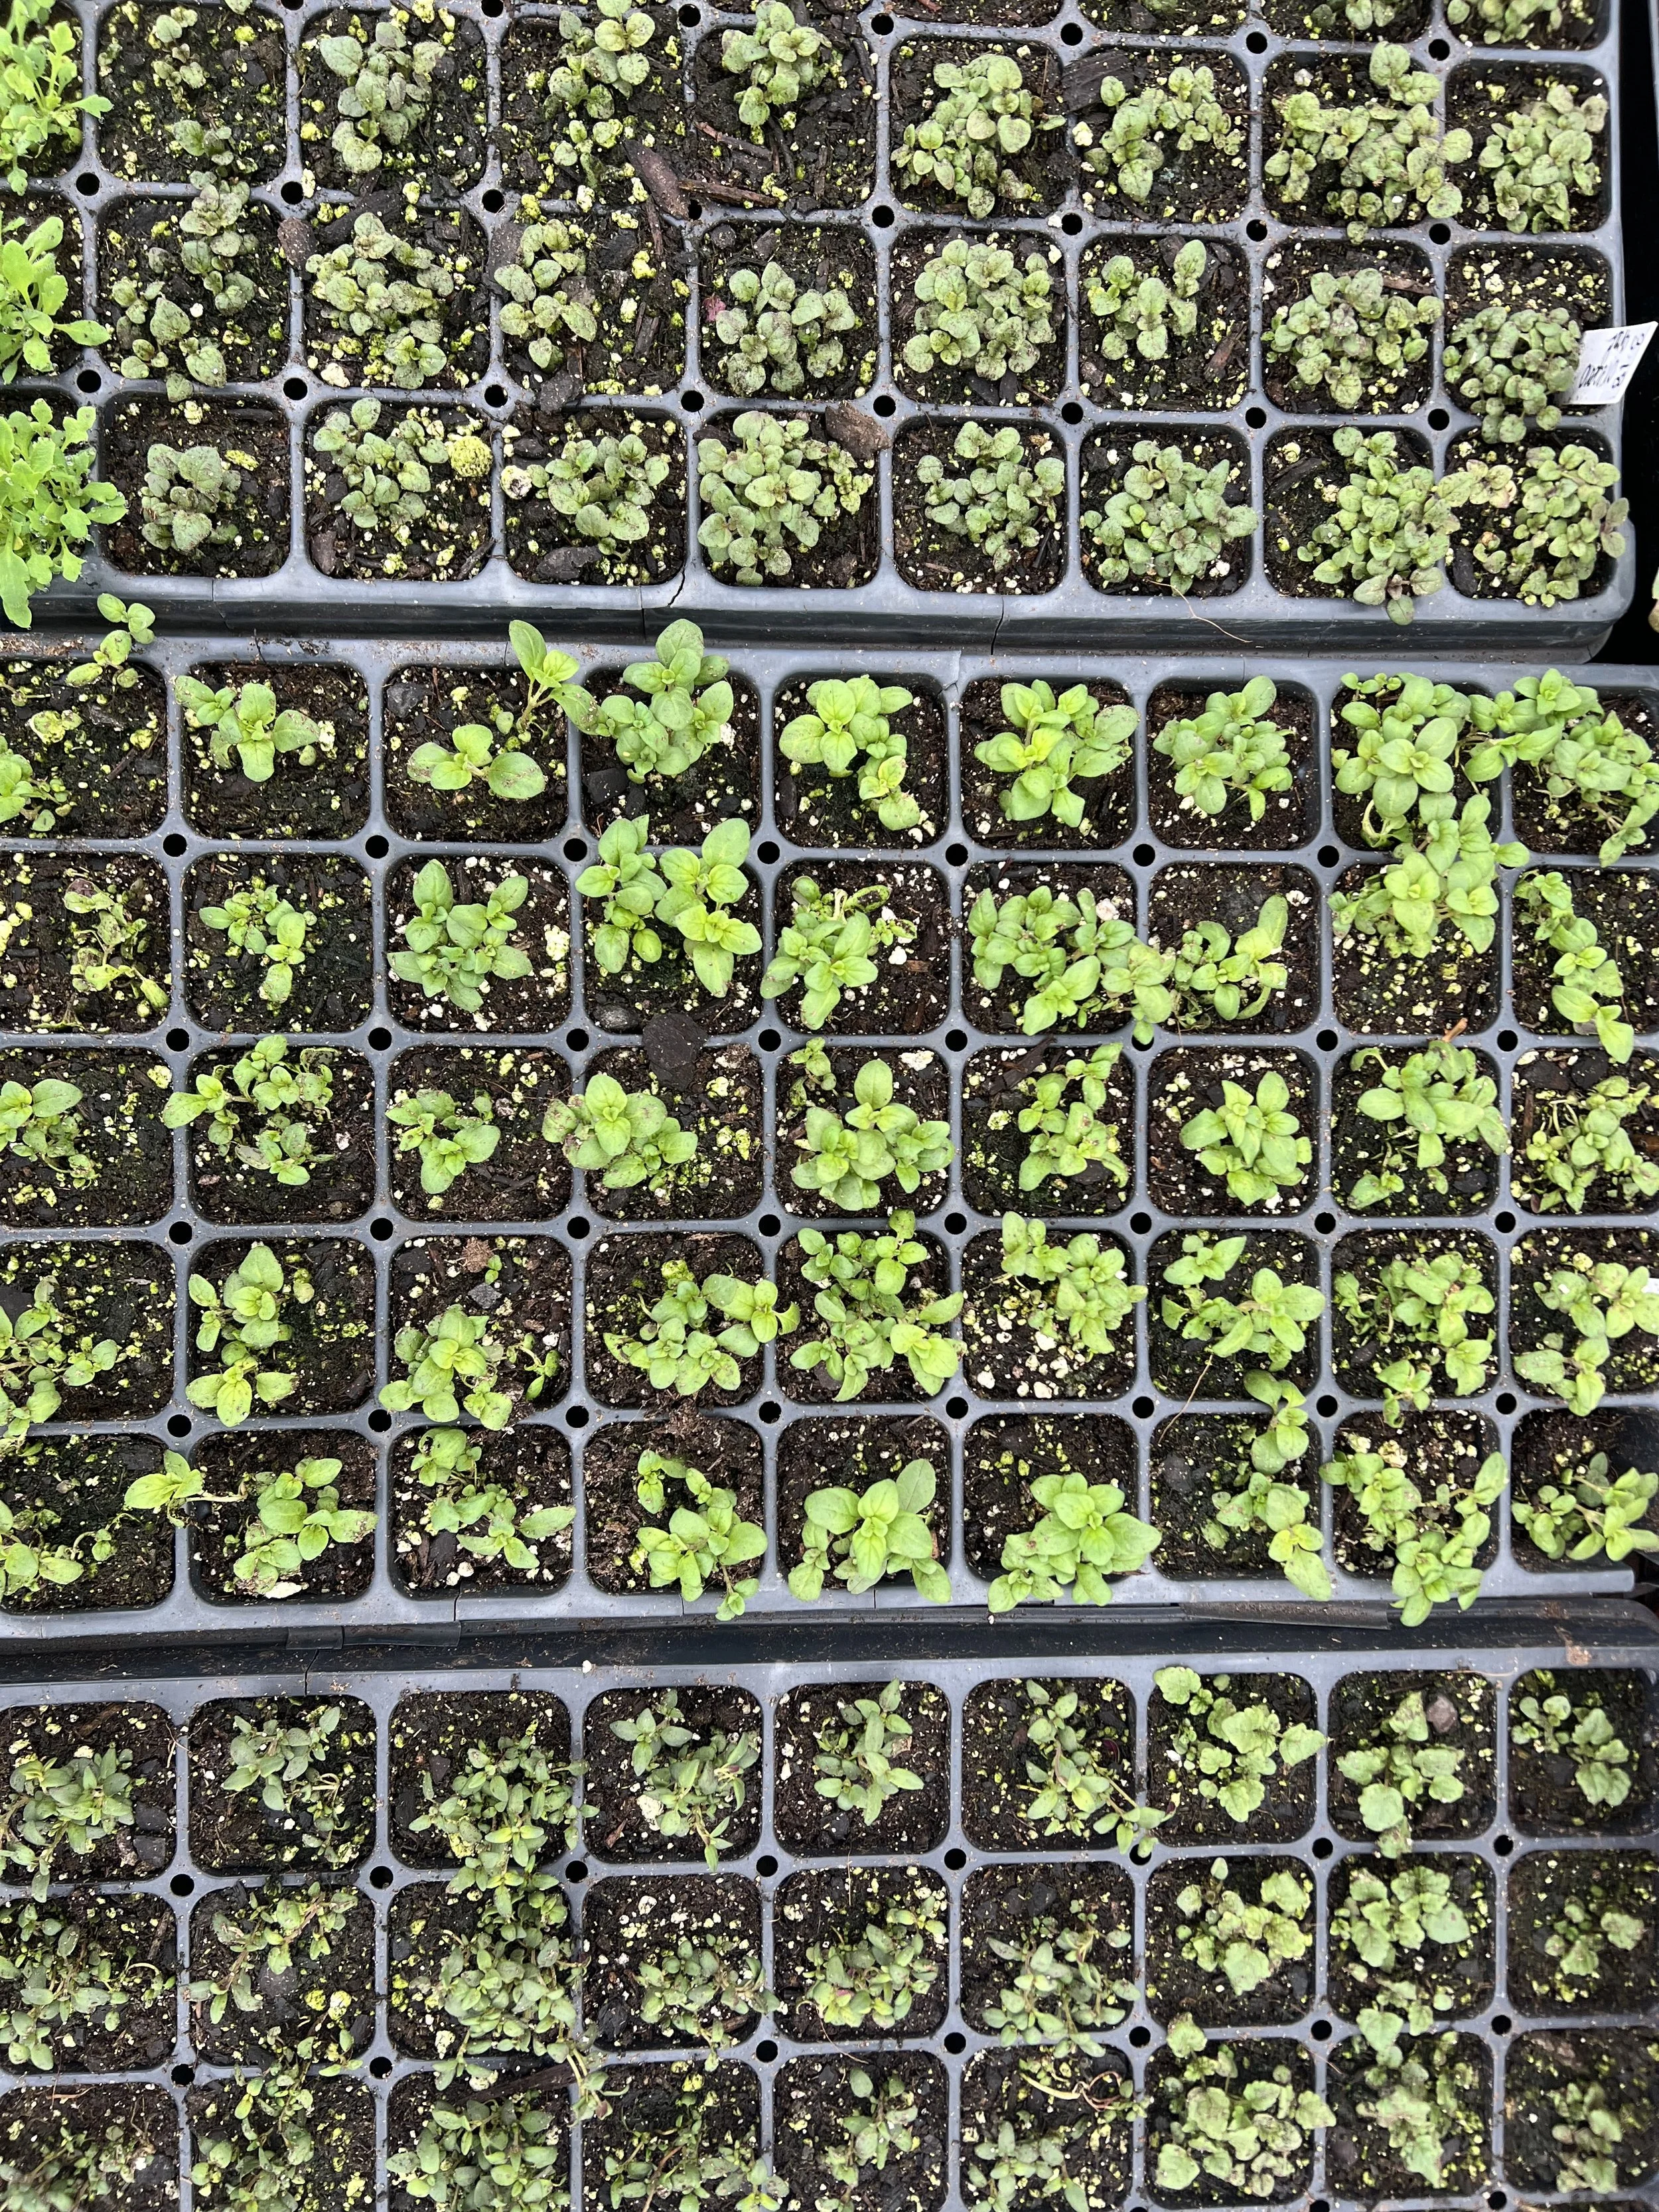
Seed Starting

Want to start your own vegetable and flower seeds indoors? Start Here!
What you will need.
Quality Seeds
Propagation trays or pots
Growing medium or soil
Grow light

1.) Quality Seeds.
Germination rates will be higher when using quality seeds. Seeds lose viability when stored improperly. What’s proper seed storage? Cool, dark, and dry (the opposite conditions for seed growth!) My personal seed storage includes seeds stored in zip lock bags or airtight mason jars and then placed into the refrigerator. If your seeds were not stored in proper conditions, I recommend starting with new seeds.
2.) Propagation trays or pots. Its best to start with new or sanitized propagation trays. I like to use 128 or 50 cell trays depending on what I am seeding. Peet pots or sanitized recycled containers are also options.
3.) Growing medium should be sterile and should not have any fertilizer in it. Premixed blends with fertilizer are too “hot” (nitrogen hot) for seeds and will burn them. A blend intended for germination is also an option. I like to use Pro-Mix potting soil.
4.) Lighting. Seeds need proper light to avoid etiolation (elongated pale stems.) Etiolated plants are weaker and more susceptible to disease. A simple florescent shop light is sufficient to start seeds indoors if used properly. The light needs to be directly over the tray. As the seeds germinate and start to grow, you will need to adjust the light based on the height of the plant. You want the light as close to the plant as possible without touching it. I also like to use a light timer, so I do not have to remember to turn it on and off daily. I use a T5 Fluorescent grow light.

Now you’re ready to seed!
1.) Prepare the soil. Prepare the soil by pre-moistening it. I like to mix my soil in a storage bin. Most growing mediums are very dry (for ease of transport) so they will need a significant amount of water. You will mix the soil water mixture like cake batter. The ideal hydration level should be tested by squeezing a handful of soil in your hand. It should not be dripping. When you open your hand back up, the clump of soil should not fall apart but hold firm together like a patty.
2.) Prepare your trays. Pack the pre-moistened soil into the trays or pots of choice. Be sure to tamp the trays down for compaction and fill all four corners to the top. Once filled, brush off the excess soil on the walls between cells.
3.) Label I recommend labeling what you are seeding so it stays organized. Also, if you have a seed failure on one crop, you will know what needs re-seeded.
4.) Let’s seed! Let us seed! For most crops, you will want to seed one seed per cell. I seed one seed per cell for all brassicas, lettuce heads, tomatoes, peppers, summer, zucchini, cucumber, celery, sage, and most flowers. If you seed more than one seed per cell they will compete with each other and etiolate. The only seeds I seed multiple seeds per cell include clumping herbs like lavender, rosemary, thyme, marjoram, and mint. Once seeds are in their cell, I press them firming into the soil with my fingers. You can sprinkle a fine sift of vermiculite over the seeds if you like but I usually just press them in firmly and leave as is.

5.) Watering. Now the seeds are in moist soil trays, they need misted frequently. How frequently depends on your conditions. You want the soil medium to stay moist for proper germination. Sometimes its just once a day whereas in warmer conditions it might require several mists a day. I would plan to check in on the seeds 3 times a day. Morning, mid-day, and at sunset.
6.) Temperature. Most seeds germinate best between 68- and 86-degree F. If your home is not warm enough, a seeding dome is possible to use. The dome will assist with warmth and moisture. Be careful not to overwater if you are using a dome since it retains moisture as opposed to open air loss.
Timing. You want to seed at the appropriate time.
- Cool season crops (lettuce, spinach, brassicas, and chard) I seed at the beginning of March and plant out into the garden April 1st-15th.
-Warm season crops (tomatoes, peppers, and basil) I seed in mid-April and plant out into the garden May 25th – June 1st.
-Cucurbits (winter squash, summer squash, zucchini, and melon) grow extremely fast, so I don’t seed them it until beginning to mid-May and plant them out into the garden May 25th – June 1st.
If this is your first time seeding, I recommend starting with beginner friendly crops such as tomatoes, cucumbers, beans, kale, lettuce, and basil.

If you live in Michigan, most of these items will be available at your local grow store. Other states may have to purchase these products online.


Spring Time Tasks
Spring Crocus
Spring is one of my favorite times of the year. Where all living organisms in our garden, as well as the plants, are once again, waking from their deep slumber to show their brilliance and beauty of life. There's something so invigorating and enchanting about spring; I too wake from the deep slumber of dormancy winter brings and become a frolicking fairy through the gardens once more.
There is nothing more exciting than getting your garden areas prepped for a new season! Spring is coming and we need to get cleaning and prepping!
But don’t grab your gloves, shovels, and gardening tools just yet!!!
Let's talk about the debris around our yards when beginning our spring clean-up. This is where many of our important pollinators overwinter for the year, we want to make sure we don't start our spring clean-ups too early. If done too soon this will harm and potentially kill our little friends who are so integral to our garden spaces.
Our pollinators live and overwinter in the layers of leaves left behind in the fall. The leaves, hollow canes, and dead flower stalks are all secret hidden homes. The variety of spaces in our overwintered habitats provide safety and shelter from the cold and food sources as well. Raking, shredding, and blowing leaves too early may destroy delicate chrysalids, and/or the insects themselves.
One very important piece of knowledge to always keep in mind is that insects don't emerge at the same time. Therefore, we want to wait as long as possible before we start spring clean-up, and you may be wondering. Well... then when???
Ideally home gardeners should wait until the temperatures are consistently 50-59 degrees here in Michigan! It's hard to know the exact date of to begin because seasons are unpredictable and it’s very dependent on a multitude of signs. Here are a few (keep in mind it can vary).
· Blooming dandelions
· Wild violets
· Red bud trees
· Apple blossom blooms
· Crab apple blooms
Another helpful tidbit: Waiting a little longer to mow is a really great way to give our pollinators more food reserves. No Mow May has been a recent movement to give pollinators their first chance at sources for food. Wait as long as you can to mow, letting the dandelions, wild violets and other wildflowers bloom will provide nourishing forage to our early pollinators especially our beloved bees.
Now, after we've waited long enough, the grass has become taller and lusher, the weather is consistently in the 50's or above, and we see blooms and budding; We are ready to begin! Get your gloves, shovels, and gardening tools ready because we are in it for the long-haul!
First and foremost, garden planning, it is essential to create the idea you have in mind before you begin! If you have notes from last year this can be extremely helpful for your planning. It can be a loose plan or a strict project design/plan. Examples of this can be making lists of each area on your property and various tasks for those areas. Adding beds or adding plants to the beds, taking away from beds, and replanting them elsewhere, etc. It can also be creating a mockup of your yard with exact measurements. Like a blueprint of your yard indicating where to plant and what you want to plant based on the soil type, the topography of the land, what was planted there last year, what is already there from last year, and/or anything else you may like to add.
Spring is the perfect time to assess if anything needs repairs due to damage over the winter when it comes to wooden beds, irrigation lines, plants, hoop-houses, garden hoses, and plant tag replacing.
Spring is also a great time to divide and transplant perennials!
The order of this list can vary based on your own personal gardening preferences but, to give you an idea…
1. Clean Out Garden Shed (Sanitizing tools, sharpening tools, replacing tools/adding new tools)
a. Rake Leaves out of Garden Beds (de-clutter the beds and to add new compost/fertility to the soil)
2. Clean-up the Lawn (Branches, dog poop, debris)
3. Prune Summer Flowering Perennials and Shrubs
a. Pull any/all unwanted weeds the best time to do so is when the soil is moist and they are young and not deeply rooted.
4. Remove and Compost Annuals
5. Prepare Garden Beds for Planting
a. Prepare vegetables and plant cool season crops.
6. Uncover Sensitive Plants
7. Reseed and Aerate the Grass
8. Compost or Fertilize Garden Beds
9. Mulch Flower Beds
10. PLANT SHOPPING
Happy gardening friends!!!
-Alice Wilson, Horticulturalist

Why Native Plants?
Native Plants are as beautiful as they are important to our local ecosystem!
“In the U.S., “there are 50 million acres of lawn. Maintaining all this turf requires trillions of gallons of water, 200 million gallons of fuel (for mowing), and 70 million pounds of pesticide each year.” -Wild Ones. All these inputs take a toll on both the environment and your budget!
Urbanization has taken an ecological impact on the land. As a result, our landscape no longer supports functioning ecosystems. It’s essential that we restore native plant communities to preserve biodiversity. By planting native plants in your garden, we can be part of the solution!
“Native plants are the indigenous species that have evolved and occur naturally in a particular region, ecosystem, and habitat.” -US Forest Service
Native plants have evolved and adapted to the local environment for thousands of years. They are an important part of our local habitat and perform important ecosystem services.
Benefits of using Native Plants
· Native plants are sustainable and adapted to thrive in the our regions soils and weather conditions.
· Native plants restore healthy, natural environments and create wildlife habitat.
· Improved water quality. Since many natives are deep rooted, they can slow down storm water, reduce erosion, and excess nutrient runoff.
· Native plants pull carbon out of the atmosphere and fix it into soil for plant use.
· Reduced maintenance! Native plants thrive in the natural environment. Outside of plant establishment, they require no additional water or fertilizer.
· Little to no pest control needed for native plants. Many are deer resistant.
· Native plants attract beneficial insects to the garden.
· Native plants are an excellent source of food for pollinators.
· Native plants reduce fire risk while invasive species increase fire risk.
Research conducted by the National Audubon society reveal that native oak trees support more than 500 species of caterpillar ( an important food sources for birds), while introduced ginkgo trees from Asia support only 5 species. Alien species may be beautiful but do very little to support the local ecosystem. Incorporating native plants into your landscape can be part of the solution to restore biodiversity in our local ecosystem for future generations.
Want to learn more or get involved?
MSU Extension - www.canr.msu.edu/nativeplants/plant_facts/local_info/index
Wild Ones – www.wildones.org
List of Nurseries that grow native plants
www.wildoneslansing.weebly.com/nurseries-that-grow-native-plants.html
-April Hoard
Horticulturalist